1- Theory:
MAIN PARAMETERS OF
DYNAMIC COMPRESSION:

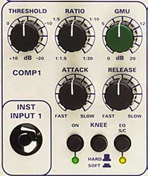
A- THRESHOLD:
In
practice, the compressor is active only from
the time the audio signal reaches a certain
level called the threshold, it is expressed in
dB (decibels) and is adjustable using the
button "Threshold"
Below
this threshold, the compressor is not running,
the sound enters and exits the compressor
without any change in the level. The dynamics
of the audio signal exiting the compressor via
the output (Output) is the same as that of the
signal that enters the compressor through the
inlet (Input)
What happens if the input
signal exceeds the threshold?
The
compressor becomes active and can then perform
the compression of the dynamic as we will see
below.
B- THE COMPRESSION
RATIO:
The
compression ratio, or ratio, expressed as a
fraction x: y represents the amount of
compression that will suffer the signal. The
more this fraction will be larger, the more the
sound will be compressed.
The
ratio x: y means that whenever the threshold is
exceeded by x db, the compressor will let only
y db.
Formula:
Let
I, O, S, R, x and y such that:
I
= Input level
O
= Output Level
S
= Threshold
Ratio
= x: y
The
formula that expresses the relationship between
the various parameters of the compression is as
follows:
O− S= y(I− S) /
x
Practical
examples:
Exemple
1:
Threshold:
-20 dB and ratio: 2:1
A
2:1 ratio means that whenever the signal
exceeds the threshold of 2 dB, the compressor
will let only 1 db. If the input level is equal
to -18 dB, the compressor will reduce the
output to -19 db. If the input level is equal
to -10 dB, the compressor will reduce the
output to -15 db. If the input level is 0 dB,
the compressor will reduce the output to -10
dB
Exemple
2:
Threshold:
-10 dB and ratio: 4:1
A
4:1 ratio means that whenever the signal
exceeds the threshold of 4 dB, the compressor
will let only 1 db. If the input level is equal
to -6 dB, the compressor will reduce the output
to -9 dB. If the input level is equal to -2 dB,
the compressor will reduce the output to -8 db.
If the input level is 0 dB, the compressor will
reduce the output to -7.5 db
C- ATTACK:
In
milliseconds, this parameter represents the
time required for the compressor to go into
action. It will have a great influence on the
attack (and thus the timbre) of the recorded
sound. Try to experiment ...
Too
short Attack time in some cases will tend to
flatten the signal, and to diminish the
percussive aspect, whereas an attack time too
long will affect the quality of the compression
...
D- RELEASE:
In
milliseconds, this parameter represents the
time required for the compressor to recover the
stand by once the threshold is no longer
reached. It will have a great influence on the
maintenance (and thus the timbre) of the
recorded sound. Try to experiment ...
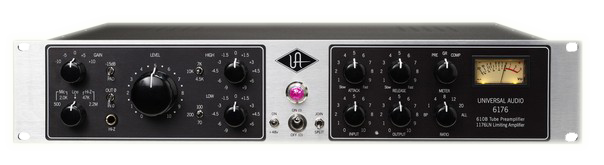
E- MAKE-UP:
Also
called "gain compensation" and often with an
adjustable knob, it can increase or decrease
the level of the output signal (after
compression) this setting is indisponsable at
major compressions.
2- Practice:
COMPRESSION IN
ADOBE PREMIERE PRO:
In Adobe Premiere Pro ( in any editing
software as well), it is surprisingly easy to
apply compression to an audio track, just click
on the audio track you want to compress, and
apply a compression effect (via the bin "Audio
Effects", see photo below)
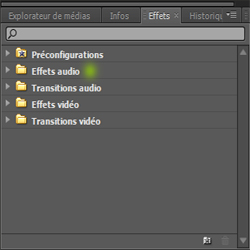 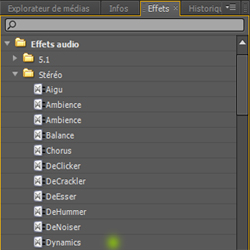
Various options
are available: Mono, Stereo or 5.1. By
selecting "Stereo" for example, we access all
stereo audio effects available, just choose
your favorite compressor. For information,
hundreds of free VST compressors are available
on the net.
For this article
I chose a basic compressor called "Dynamics",
by clicking and dragging to place it on my
track, I can access the settings of various
parameters.
COMPRESSOR
INTERFACE:
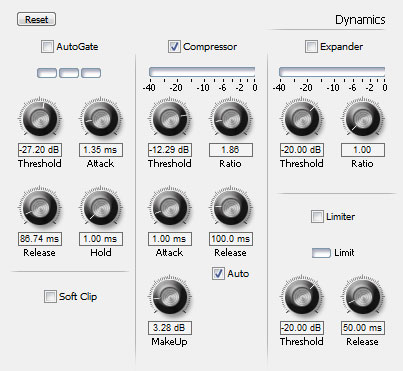
Here I will
focus only on the compressor section (middle
section), the other parts, AutoGate and
Expander sections may be seen in futur
articles.
The compressor
is enabled by default, if this is not the case,
activate it by checking the "Compressor"
And here we find
the different commands we have seen in the
theoretical part. As a reminder, Threshold is
the level at which the compressor becomes
active, ratio corresponds to the importance of
our compression, the attack correspond to the
reactivity of the compressor.
A small
horizontal bar, graduated from 0 to -40 db
indicates the importance of the compression
(and thus: the reduction of the level) ..
Ok, but where
to start?
Take the case of a voice-over, I guess it
was accurately recorded, ie that the microphone
was located at a safe distance, not too close
to avoid distortion, the sounds of mouth and
other side effects, and not too far away to
avoid ambient noise, and to keep a voice as
clear as possible.
Depending on the type of microphone used,
the power of the voice and location of the
sound, the microphone should be set at a
distance between 20 and 40 cm (more or less)
Another key parameter is the gain of my
record, it is controlled by the device that I
use for the sound (camera, portable recorder,
mixer ...). The basic rule is: "a too high gain
will produce an unrecoverable distortion, a too
low gain will produce noise (breath noise)"
To compress this track, I
will first set the Threshold at -20 dB, the
ratio to 2:1 and the Attack at
0.1ms.
This represents
a starting point quite correct. Depending on
the outcome and the desired result, I will
change my settings, and especially I will not
hesitate to experiment with extreme settings,
because it is the best way to understand the
action of each parameter of the compressor.
I listen
carefully to what happens:
- If the
compression is not sufficient, ie, if I still
have too much differences in levels, I lower
the Threshold to -25 db and / or I increase the
ratio to 4:1 , and so on ...
- If the
compression is good but you find the sound too
flat, it's because the Attack is too short, it
will gradually increase the setting until i
have the desired sound.
- If the
compression is excessive, increase the
Threshold to -15 or -10 db, and / or decrease
the ratio ... etc.
CONCLUSION:
A compressor is
not intended to resolve all audio problems, in
some cases it is more appropriate to combine it
with an equalizer, or even to refrain from
using it, because if not properly set it can
cause a whole series of problems that can
deteriorate the quality of your recording.
To use the
compressor properly, it is important first to
identify the problem to treat, was the voice
recorded correctly? was the microphone at the
right distance,... etc.
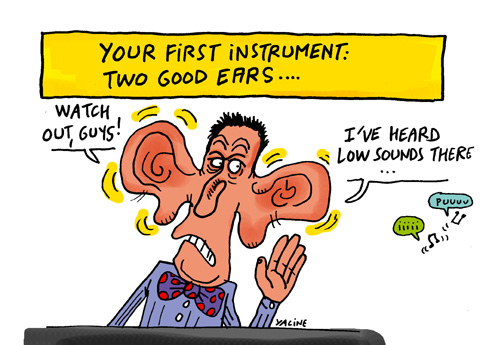
After this,
correct speakers and a good pair of ears will
be your only guide to properly parameterize
your compressor.
Voili voilou, I
hope that this article has introduced you to
the dynamic compression.
Hicham.
N.B: This is the
online assisted traduction of the french
version...Sorry for the style and for the
mistakes
|